How to Choose the Right Brake Rotor Resurfacing Lathe for Your Shop
Picking the right brake lathe isn’t just about equipment—it’s about profit!!!
In-house resurfacing delivers 70–85% profit margins, compared to just 30–40% on replacement rotors. Plus, it cuts comebacks and positions your shop as a true brake specialist.
But with on-car vs. bench, entry-level vs. industrial—how do you choose?
Here’s your streamlined guide.
Step 1: Know When to Resurface (And When to Replace)
Not every rotor should be machined. Follow this simple rule:
- Smooth & within spec → Just replace pads. No cutting needed.
- Grooved/scored but above minimum thickness → Resurface. This is where your lathe pays for itself.
- Below minimum thickness or severely damaged → Replace. No machine can fix this.
-
Golden Rule: Always check the minimum thickness stamped on the rotor. If it’s at or below that number, replacement is your only safe option.
Step 2: On-Car vs. Bench – Which Fits Your Workflow?
- On-Car Lathes
- Mounts directly to the hub while the rotor stays on the vehicle.
-
Pros Cons Eliminates hub runout – fewer comebacks Ties up a lift during resurfacing Saves rotor removal time Usually disc-only (no drums) Compact and portable Higher learning curve - Top Pick: Pro-Cut, Hunter. Value option: INTSUPERMAI.
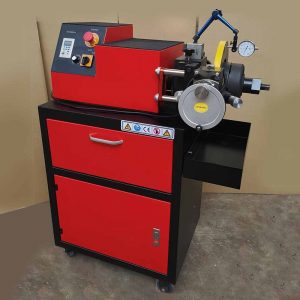
- Bench (Off-Car) Lathes
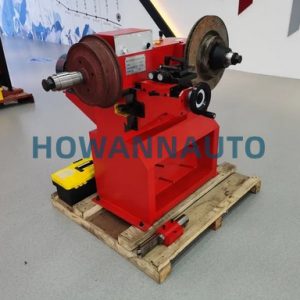
- Rotor is removed and machined on a dedicated machine.
-
Pros Cons Frees up lifts – better workflow Requires rotor removal (more labor) Handles both discs AND drums Takes up permanent floor/bench space More powerful for larger trucks
Step 3: 5 Key Features to Look For
-
Precision – Look for tolerances of 0.02mm or better. DC servo motors reduce vibration for a smooth finish.
-
Motor Power – For passenger cars, 0.75–1.1kW is plenty. Variable speed is a plus.
-
Ease of Use – Automatic feed, digital readouts, and single-pass cutting save time and reduce errors.
-
Build Quality – Heavy cast iron = less vibration = better results and longer tool life.
-
Versatility – Does it handle both discs and drums? Does it come with a comprehensive adapter kit?
Step 4: Supplier Selection – What B2B Buyers Must Check
- You’re not just buying a tool—you’re entering a business relationship.
-
Certifications: Look for ISO 9001 (quality management) and CE marking (safety standards).
-
Delivery & Support: Choose suppliers with near 100% on-time delivery and ≤3-hour response times.
-
Reorder Rate: A high reorder rate (e.g., 30%+) from commercial buyers is a strong signal of reliability.
- Quick Price Guide
-
Level Price Range (USD) Best For Entry-Level (Manual) $1,800 – $2,200 Occasional use, small garages Mid-Range (Semi-Auto) $2,500 – $5,500 Independent shops, moderate volume High-End (Fully Auto) $10,900+ High-volume shops, dealerships
- Final Takeaway
- A brake lathe is a profit center, not just a tool.
-
Fighting pulsation comebacks? Go on-car.
-
Need maximum versatility for discs, drums, and trucks? Go bench.
- Match the machine to your workflow, choose a reliable supplier, and you’ll have a money-making asset for years to come.
Quick FAQs
- Why don’t more shops resurface rotors?
Because replacement rotors for many commuter cars have gotten cheap. But for trucks, performance cars, and rare vehicles, resurfacing is still highly profitable. - Can I cut drilled/slotted rotors?
Not recommended. The cutter can snag on holes or slots, ruining the finish and potentially damaging the machine. - How much material is removed?
Typically just 0.125mm per side (0.25mm total)—enough to clean the surface while staying above the minimum thickness.